
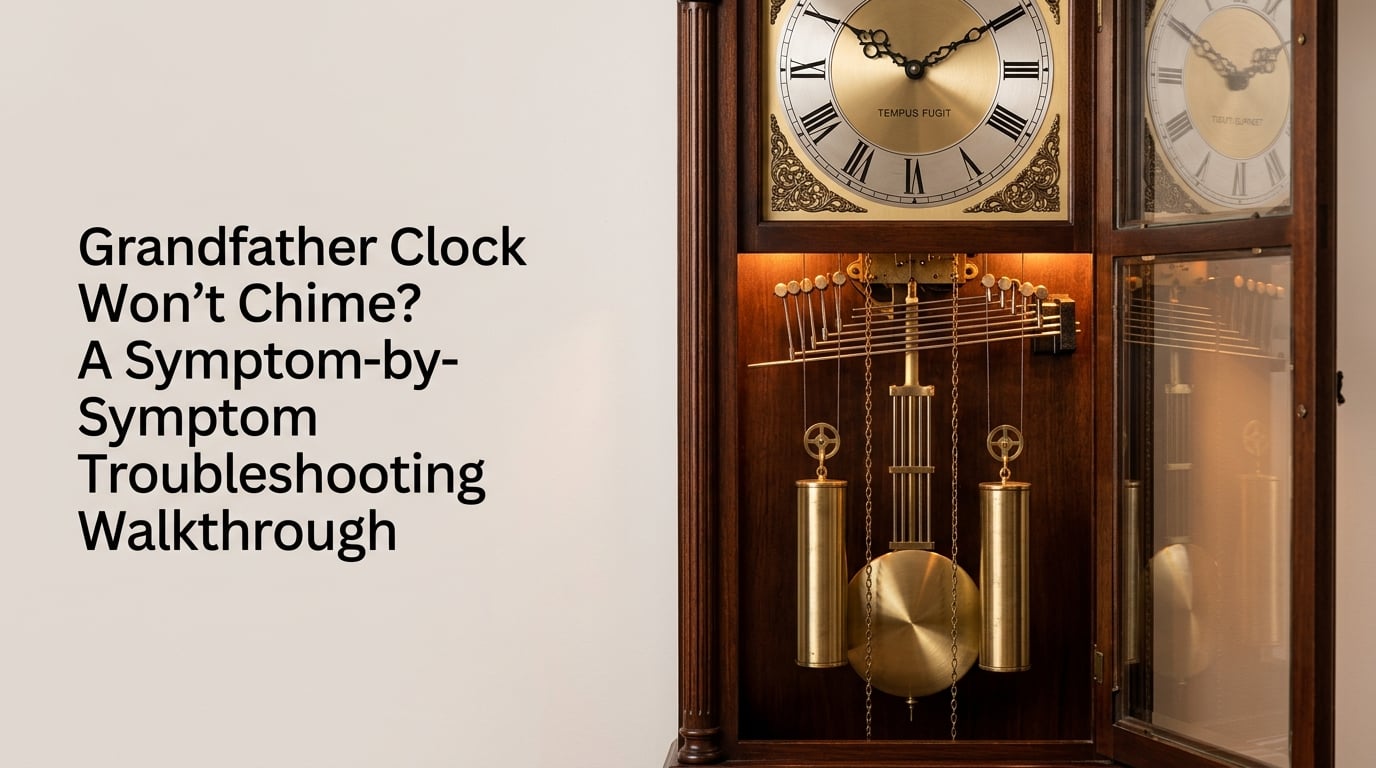
There is something unsettling about a silent grandfather clock. The pendulum swings, the hands tick forward, but the chimes that once marked every quarter hour refuse to sound. If you are dealing with this right now, you are far from alone. Grandfather clock chime problems are one of the most common issues clock owners face, and the good news is that most of them are fixable without calling a repair professional.
This grandfather clock won’t chime troubleshooting guide walks you through each symptom methodically. Rather than throwing a list of possible fixes at you and hoping something sticks, I have organized this as a diagnostic walkthrough. You identify what your clock is doing (or not doing), then follow the specific steps for that problem. In my experience repairing and maintaining clocks, this approach saves hours of frustration.
Before we get into individual symptoms, there is one thing worth understanding. Your clock actually has two separate mechanisms running side by side: the time train (which keeps the hands moving) and the chime train (which produces the melodies and strikes). When a clock keeps perfect time but stays silent, the problem lives in the chime train alone. This distinction narrows your search dramatically, and we will use it throughout this guide.
Most chime failures come down to a handful of causes: a silence lever left in the wrong position, a weight on the wrong pulley, hands that have drifted out of sync, or a mechanism that needs cleaning and oiling. I have seen inherited clocks sit silent for decades and come back to life after a simple adjustment. Let us work through your specific symptom.
Table of Contents
Quick Checklist: The 5 Things to Check First
Before diving into detailed troubleshooting, run through this 30-second checklist. These five checks solve the majority of chime problems I encounter, and they take almost no time to verify.
1. Silence lever position. Look for a small lever near the 3 o’clock position on the clock dial. If it is set to “silent” or “night off,” your chimes will not play. Slide it to “on” or “play” and wait for the next quarter hour to confirm.
2. Chime weight placement. Most grandfather clocks use three weights, and they are not interchangeable. The heaviest weight typically powers the chime train and goes on the right side (as you face the clock). If the weights were removed for moving and put back in the wrong order, the chimes will not function.
3. Chime selector position. If your clock has a selector for Westminster, Whittington, or St. Michael’s melodies, make sure it is set firmly on a chime option. A lever caught between positions can prevent the chime train from engaging.
4. Minute hand position. Move the minute hand clockwise to the next quarter-hour mark (the 12, 3, 6, or 9 position). Wait to see if the chime triggers. If it does, your clock may simply be out of sync.
5. Night shutoff status. Some clocks have an automatic night silencing feature that mutes chimes between roughly 10 PM and 7 AM. If the clock thinks it is nighttime, or if this mechanism is malfunctioning, chimes will stay off during those hours.
If none of these quick checks solve the problem, do not worry. The symptom-by-symptom sections below cover every common chime issue in detail.
How Your Chime Mechanism Actually Works
Understanding the chime mechanism helps you diagnose problems with confidence. You do not need to become a horologist, but knowing what happens inside the case turns a mysterious silence into a logical puzzle.
Your grandfather clock runs on three independent gear trains, each powered by its own weight. The time train moves the hands and keeps the clock running. The chime train plays the melody at each quarter hour. The strike train counts out the hour with a series of gong strikes. Because these trains operate independently, one can fail while the others continue working perfectly.
When the minute hand reaches a quarter-hour position, it triggers a release lever in the chime train. This lever frees the chime mainspring (or weight-driven gear), which begins to turn. The turning gears activate a series of lift pins that raise and lower small hammers in sequence. Each hammer strikes a tuned rod or gong, producing the notes of the melody.
The Warning Wheel: Why Your Clock Hesitates Before Chiming
The warning wheel is a small but important component in the chime train. Its job is to hold the mechanism in a ready position until the exact moment the chime should begin. When the minute hand reaches the right spot, the warning wheel releases and the chime sequence starts. If the warning wheel is stuck, bent, or has a damaged pin, the chime train never gets the signal to begin playing.
This is why some clocks hesitate, click, or make a partial sound at the quarter hour without actually chiming. The warning wheel is trying to release but cannot complete the cycle. A bent warning wheel pin is one of the more common causes of complete chime silence in older clocks.
Rack and Snail: How Your Clock Counts the Hour
After the chime melody finishes at the top of the hour, the strike mechanism takes over. It uses a component called the snail (a cam shaped like a spiral) attached to the hour hand arbor. A rack with teeth drops onto the snail at a height that corresponds to the current hour. The strike train then lifts the rack one tooth at a time, striking the gong for each tooth.
This rack-and-snail system is why your clock can sometimes chime the wrong number of times. If the rack drops at the wrong position, or if the gathering pallet that lifts the rack malfunctions, the strike count will be off. We will cover how to address this in the wrong-hour section below.
Symptom 1: Chimes Are Out of Sync With the Time
If your clock chimes at the wrong times, such as chiming at 10 minutes past the hour instead of exactly on the quarter, the chime train and the time train have fallen out of synchronization. This is the most common chime problem, and fortunately, it has a straightforward fix that works on most mechanical grandfather clocks.
The reset procedure is simple but requires patience. Move the minute hand clockwise to the next quarter-hour position (the 12, 3, 6, or 9 on the dial). When the chime begins, let it play completely without interrupting. Once it finishes, advance the minute hand to the next quarter-hour mark and let that chime play fully. Repeat this process until the chimes match the time shown on the clock face.
Never force the minute hand past a point where it resists. If the hand stops, wait for the chime mechanism to engage and complete its cycle before continuing. Forcing the hand can bend the arbor or damage the gears inside the movement.
On many modern grandfather clocks, this synchronization will also correct itself automatically within one to two hours of normal operation. The movement is designed to catch up on its own. However, manually advancing the hands as described above speeds up the process and confirms the mechanism is working properly.
What If the Chimes Are 15 Minutes Off?
If your chimes consistently play exactly 15 minutes early or late, the minute hand itself has been installed at the wrong angle on its arbor. This happens when someone removes the hand for maintenance and puts it back slightly rotated. The fix involves removing the minute hand nut, lifting the hand off, and repositioning it so it points exactly at the 12 when the chime triggers.
Be gentle when removing the hand nut. It is typically a small brass nut that screws off counterclockwise. If it is tight, use a pair of pliers with a cloth between the jaws to avoid scratching the nut. Once the hand is repositioned and the nut is replaced, test the timing by advancing to the next quarter hour.
Symptom 2: Clock Does Not Chime at All
A completely silent clock is the most frustrating symptom, but it is also one where systematic checking pays off. If your clock keeps time but produces no chime sound whatsoever, work through these checks in order.
Step 1: Recheck the silence lever. I know this was in the quick checklist, but it is worth repeating because it is the cause of total silence more often than any other single issue. The silence lever can get bumped during dusting, or someone may have switched it intentionally and forgotten. Check it one more time and make sure it is firmly in the “on” or “chime” position.
Step 2: Verify the chime weight is on the correct line. Remove the front panel and look at the three weights hanging inside the case. The chime weight is usually the heaviest. It should be on the line or chain on the right side as you face the clock. If someone swapped the weights during a move, the chime train will not have enough power to operate.
Step 3: Listen for the chime train engaging. Stand next to the clock at a quarter-hour mark and listen carefully. You should hear a soft click or mechanical sound as the chime train is released. If you hear nothing at all, the release mechanism is not being triggered. This points to a problem with the warning wheel or the lift pins on the minute hand arbor.
Step 4: Check for a jammed chime train. If the chime weight has dropped to the bottom of the case but the time weight has not moved proportionally, the chime train may be jammed. This can happen when old oil turns sticky, when a gear tooth is damaged, or when a hammer has come loose and wedged itself in the movement. A jammed train requires careful inspection and possibly professional service.
Chains and Cables: When the Weight Will Not Drop
On chain-driven clocks, the chain can come off its pulley or sprocket inside the movement. When this happens, the weight hangs but provides no pulling force on the chime train. You may be able to see the chain sitting loose rather than wrapping around the sprocket correctly. Reattaching a chain requires patience and steady hands, and in some cases, you may need to remove the movement from the case to access the sprocket.
Cable-driven clocks can experience a different issue: the cable can fray or the pulley can bind. If you notice any fraying on the cable, stop using that line immediately and contact a professional. A snapped cable under tension can damage the movement and cause injury.
Bent Pins and the 11:55 Problem
One specific issue I have seen repeatedly on forum discussions involves clocks that stop at 11:55. This is often caused by a bent pin in the chime lever assembly. The pin fails to lift at the correct moment, and the chime train never releases for the final quarter before the hour strike. If your clock consistently stalls at this position, inspect the lift pins on the minute hand arbor for any that appear bent or worn.
Symptom 3: Chimes at the Wrong Hour or Wrong Count
When your clock chimes the melody correctly at the quarter hours but strikes the wrong number of times on the hour, the strike count mechanism is out of adjustment. This is different from the chime melody being out of sync, and it requires a different approach.
First, understand that the chime melody and the hour strike are handled by two different mechanisms. The chime train plays the Westminster (or other) melody. The strike train counts out the hour. So your clock can chime perfectly at 7:45 but then strike nine times at 8:00. The melody is fine, but the strike count is wrong.
The Manual Correction Method
On many grandfather clocks, the strike count will self-correct within 12 hours if the clock is left to run normally. The rack-and-snail mechanism is designed to realign itself as the hour hand passes through its cycle. So the first thing to try is simply letting the clock run for half a day and seeing if the count corrects itself.
If it does not self-correct, you can manually advance the hour hand to match the strike count. Gently slide the hour hand (it is a friction fit on its arbor) to point at the number matching the number of strikes you heard. For example, if the clock struck five times but the hand points to seven, slide the hour hand to the five position. Then use the minute hand to set the correct time. The strike mechanism will now be synchronized with the hand position.
Never force the hour hand. It should move with light finger pressure. If it resists, you may be dealing with a tight arbor, and forcing it could damage the dial or the movement. In that case, professional adjustment is the safer option.
When the Strike Count Is Consistently Wrong
If the strike count is always off by the same amount (always one hour behind, for instance), the snail or the rack may have shifted on its arbor. This is a more involved repair that typically requires removing the movement from the case. The rack needs to be loosened, repositioned, and tightened at the correct angle relative to the snail.
This is also a common issue after a movement has been serviced or repaired. If the clock was recently worked on, the technician may not have reassembled the rack and snail at the correct alignment. Contact the repair service if this is the case.
Symptom 4: Chimes Sound Sluggish, Slow, or Off-Key
When your clock chimes but the melody sounds wrong, you are dealing with a performance issue rather than a silence issue. The chime train is functioning, but something is affecting how the hammers strike the rods. This symptom has several possible causes, ranging from simple to complex.
Check the Chime Weight First
A sluggish chime often means the chime train is not receiving enough power. Verify that the correct (heaviest) weight is on the chime line. If the weight is correct, check whether anything is obstructing it from dropping freely. A weight rubbing against the side of the case or a cable catching on a pulley can reduce the effective pulling force.
Also confirm that the weight has been fully wound. On cable-driven clocks, wind the chime cable until the weight reaches the top of its travel. A partially wound weight may not provide enough consistent force for the entire chime sequence.
Hammer Distance From the Gong Rods
The hammers in your clock need to be positioned at the correct distance from the chime rods. If a hammer sits too far from its rod, the strike will be weak or inaudible. If it rests against the rod, the note will be muffled or deadened. The ideal gap is roughly the thickness of a business card between the hammer head and the rod when the hammer is at rest.
You can adjust this by carefully bending the hammer wire. Use your fingers to gently push the hammer closer to or farther from the rod. Make small adjustments and test after each one by advancing the minute hand to trigger that specific hammer. Go slowly, as overcorrecting can cause the hammer to double-strike.
Different rods produce different notes in the melody. If only one or two notes sound wrong, focus your adjustment on the hammers for those specific rods. Listen for which beats in the melody are weak or missing, and trace those back to the corresponding hammer positions.
Old Oil and Gummed-Up Mechanisms
In clocks that have been running for years without service, the lubricating oil in the pivot holes can dry out and become sticky. This creates drag throughout the gear train, slowing the chime sequence and sometimes causing it to stall partway through. If your chimes sound progressively slower, or if the melody sometimes stops mid-sequence, old oil is a likely culprit.
The proper fix is a full cleaning and re-oiling of the movement. This is a job that most owners should leave to a professional, as it involves disassembling the movement, cleaning each pivot and gear in a specialized solution, and reassembling with the correct clock oil applied in precise amounts. A movement that has not been serviced in five years or more is overdue.
Bent Chime Rods
If a chime rod has been bent, the note it produces will be noticeably off-pitch. A bent rod can result from impact during moving, from a hammer striking at the wrong angle over time, or simply from age. Straightening a chime rod requires care, as the rod is tuned to a specific pitch. Small bends can sometimes be corrected by hand, but significant damage usually means the rod must be replaced.
To check for bent rods, open the back of the clock and visually inspect the rod assembly. They should all hang parallel to each other in a neat row. Any rod that angles away from the others is suspect. Compare the sound of each rod individually by gently tapping it and listening for any that sound noticeably different from the rest.
Symptom 5: Clock Stopped Chiming After Moving
This is one of the most common scenarios I hear about. The clock worked perfectly, then someone moved it across the room or to a new house, and now the chimes will not play. Moving a grandfather clock is a significant event for the mechanism, and several things can go wrong in transit.
The most important step when moving a grandfather clock is to prepare it properly beforehand. Remove the pendulum, the weights, and if possible, the chime rods or hammer assembly. Secure the movement inside the case to prevent shifting. Without these precautions, the internal components take the full force of every bump and jostle during transport.
Check the Weights First After a Move
After moving, the weights are the most common source of chime problems. They may have been placed back in the wrong order (the heaviest must go on the right for the chime train). Or the chains may have come off the sprockets during transit, especially if the chains were not secured.
Reinstall the weights in the correct order: heaviest on the right (chime train), medium in the center (strike train), and lightest on the left (time train). This arrangement is standard on most grandfather clocks, though you should verify your specific model’s requirements.
Inspect for Bent Lift Pins and Jammed Levers
If the weights are correct but the chimes still do not work, the impact of moving may have bent a lift pin or knocked a lever out of position. Open the back of the case and inspect the movement with a flashlight. Look for any pins that appear bent, any levers that are out of their normal position, and any hammers that have come loose from their mounting.
A clock that ran fine before moving but is completely silent afterward often has a chime train that jammed during transit. The jam can sometimes be freed by gently nudging the affected gear or lever, but this should be done with extreme caution. If the mechanism does not move freely with light pressure, forcing it will cause more damage.
Level the Clock Case
A grandfather clock must be level for the pendulum to swing correctly and for the chime mechanism to function. After moving, the clock case may be sitting at an angle even if it looks straight. Use a bubble level on top of the case and adjust the leveling feet (or shims under the base) until the case is perfectly level front-to-back and side-to-side.
An unlevel clock can cause the pendulum to drift, which affects the timekeeping and can interfere with the release mechanism for the chimes. Leveling is one of the simplest fixes but is often overlooked after a move.
Preventive Maintenance for Reliable Chiming
The best way to deal with chime problems is to prevent them before they start. A well-maintained grandfather clock can run for decades without a single chime issue. Here is what I recommend based on years of working with these mechanisms.
Oiling schedule: The movement should be oiled every two to three years with high-quality clock oil. This is not WD-40 or household oil, which will attract dust and eventually gum up worse than no oil at all. Use proper horological oil applied only to the pivot points. If you are not comfortable doing this yourself, a clock repair service can handle it quickly.
Full cleaning interval: Every five to seven years, the movement should be removed from the case, fully disassembled, cleaned in an ultrasonic bath, and reassembled with fresh oil. This removes the old oil and any metal particles that have accumulated in the pivot holes. Skipping this interval is the leading cause of premature movement wear.
Dust management: Dust that settles inside the case works its way into the movement over time. Keep the case closed when not winding or adjusting, and gently vacuum or dust the interior of the case once or twice a year. Do not use compressed air near the movement, as it can push dust deeper into the pivot holes.
Level checking: Check the level of your clock case every few months, especially if the clock sits on a wood floor that expands and contracts with humidity changes. Floors shift with the seasons, and a clock that was level in January may not be level in July.
When to Call a Professional Clock Repair Service
Some problems are beyond the scope of a homeowner fix. Knowing when to stop and call a professional saves you from causing expensive damage to a mechanism that may be irreplaceable.
You should seek professional service if the movement needs to be removed from the case for any reason, if gears are visibly damaged or corroded, if the chime train is jammed and will not release with gentle pressure, or if the problem appeared after the movement was already serviced and you suspect improper reassembly.
A qualified clock repair technician will diagnose the issue, provide an estimate, and explain what needs to be done. For cleaning and oiling, expect the work to take one to two weeks if the movement needs to be sent out. For more complex repairs involving replacement parts, the timeline may extend to several weeks depending on part availability.
To find a reputable repair service, I recommend checking the NAWCC (National Association of Watch and Clock Collectors) member directory or asking at a local clock shop. Members of these organizations typically have formal training and adhere to professional standards. Avoid general handymen who claim they can fix clocks, as improper repairs often cause more harm than the original problem.
For antique clocks with significant monetary or sentimental value, always choose a specialist who works with antique movements. These clocks have different construction and tolerances than modern reproductions, and a repairperson unfamiliar with them can easily cause irreversible damage.
FAQs
Why would a clock stop chiming?
A clock stops chiming most commonly because the silence lever is set to off, the chime weight is on the wrong line, or the chime train has jammed from old oil or a bent component. Less commonly, a damaged warning wheel pin or a loose hammer can prevent the chime sequence from triggering. Always start by checking the silence lever and weight placement before investigating mechanical issues.
Is it okay to move clock hands backwards?
On most grandfather clocks, you should only move the minute hand clockwise. Moving it counterclockwise can damage the chime and strike mechanisms by forcing the release levers in the wrong direction. The one exception is when you are setting the clock back for daylight saving time. In that case, stop the pendulum for one hour and restart it, rather than turning the hands backward.
How can I get my grandfather clock to chime?
Move the minute hand clockwise to the next quarter-hour position and wait for the chime to trigger. Let it play fully, then advance to the next quarter and repeat until the chimes match the time shown on the clock. If no chime sounds at all, check the silence lever position, verify the chime weight is on the correct right-side line, and confirm the chime selector is set to a melody option.
How do I make my clock chime again?
Start with the basics: confirm the silence lever is set to on, check that the heaviest weight is on the right side for the chime train, and ensure the chime selector is firmly positioned on a melody. Advance the minute hand to a quarter-hour mark and listen for the release click. If the mechanism engages but produces no sound, inspect the hammer positions and their distance from the chime rods.
Why is my grandfather clock not chiming properly?
Improper chiming usually falls into one of four categories: chimes out of sync with the time, no chime at all, wrong strike count on the hour, or sluggish and off-key sound. Each has different causes. Out-of-sync chimes are fixed by advancing the minute hand through quarter-hour positions. Total silence is usually a silence lever or weight issue. Wrong counts involve the rack-and-snail mechanism. Sluggish sound points to oil or hammer adjustment problems.
How to fix a grandfather clock that chimes the wrong hour?
If the strike count is wrong, first let the clock run for 12 hours to see if it self-corrects, since many rack-and-snail mechanisms realign automatically. If it does not correct, gently slide the hour hand to match the number of strikes you heard, then set the correct time using the minute hand. If the count is consistently off by the same amount, the rack or snail may need professional repositioning.
How do I reset the chimes on my clock?
To reset the chimes, advance the minute hand clockwise to the next quarter-hour position. Allow the chime to play completely without interruption. Continue advancing to each subsequent quarter-hour mark, letting each chime finish fully. Repeat this until the chime melody and hour strike match the correct time. Never force the minute hand past resistance; wait for the mechanism to engage instead.
Wrapping Up: Your Silent Clock Can Be Fixed
A grandfather clock that has stopped chiming is rarely a lost cause. In most cases, the fix is as simple as adjusting a silence lever, repositioning a weight, or resynchronizing the minute hand through the quarter-hour cycle. The symptom-by-symptom approach in this guide should help you identify your specific problem and apply the correct solution without guessing.
The key insight to carry forward is that your clock’s chime mechanism operates independently from its timekeeping function. When the clock keeps time but stays silent, you know the issue lives in the chime train, the strike train, or their associated components. This narrows your troubleshooting from the entire movement to a focused set of possibilities.
If you have worked through every relevant symptom in this grandfather clock won’t chime troubleshooting walkthrough and the problem persists, the next step is a professional evaluation. A qualified clock repair technician can diagnose issues that require movement removal, parts replacement, or specialized tools. The NAWCC directory is an excellent starting point for finding a reputable service in your area.
Treat your grandfather clock with patience and regular maintenance, and it will reward you with decades of reliable chiming. These mechanisms were built to last, and with proper care, they often outlive the homes they were placed in.