
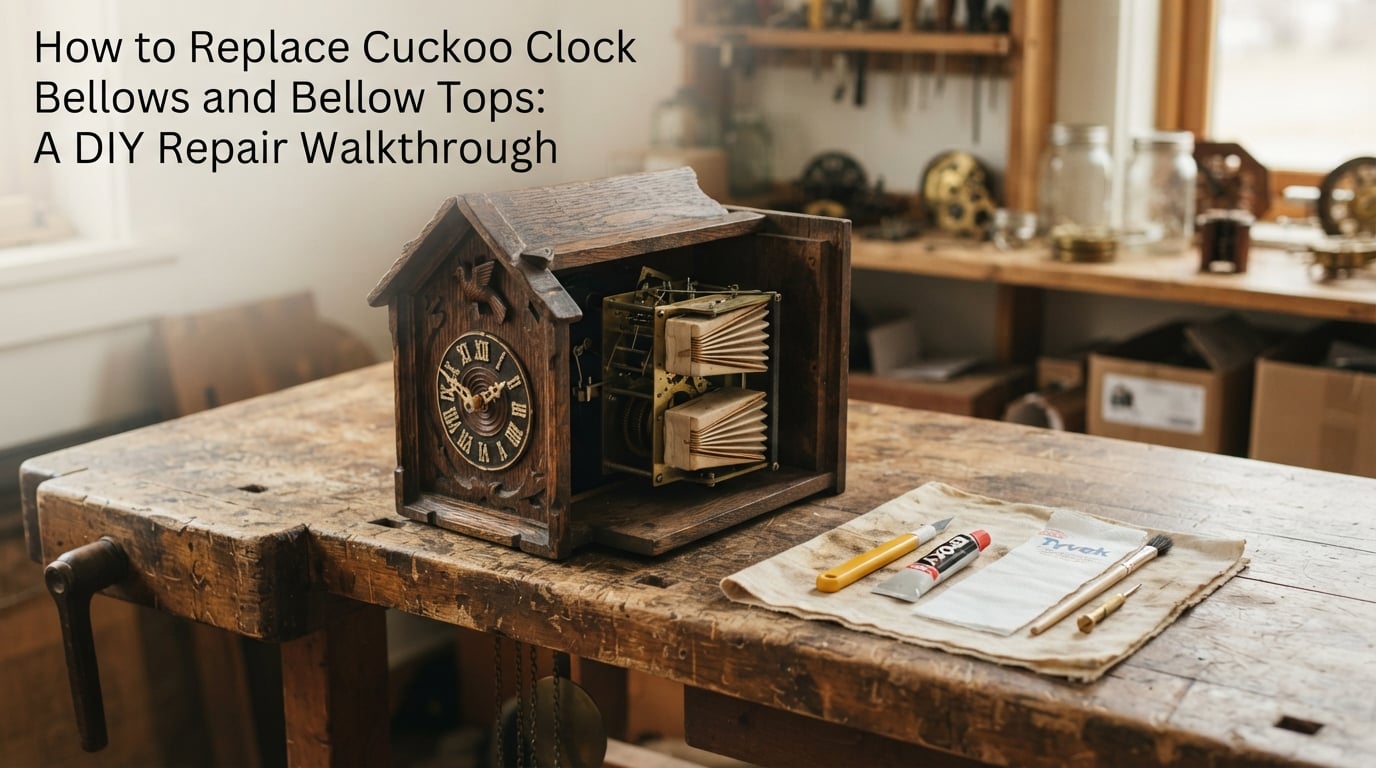
If your cuckoo clock has gone silent, the bellows are almost always the reason. I learned this the hard way when my grandmother’s Black Forest clock stopped calling the hours and I assumed it needed a full overhaul. The movement was fine, the chains were fine, and the bird was fine. The bellows had simply aged out.
This guide walks through the entire cuckoo clock bellows replacement process in plain language, whether you are replacing the entire bellows, swapping out just the bellow tops, or repairing the paper inside. I have tested each method on a Regula 25 movement and a vintage Hubert Herr movement, and I will share exactly what worked, what failed, and how to avoid the common traps.
By the end of this walkthrough, you will know which repair path fits your clock, which tools to gather, and how to get your cuckoo calling again without shipping the clock off to a shop. The whole job usually takes 30 to 90 minutes for a first-timer, and the parts cost less than a shop service fee.
Quick Answer: To replace cuckoo clock bellows, remove the clock movement, snap off the old bellow tops with a utility blade, clean the tube surface, and epoxy new bellow tops onto the tubes. For a full replacement, swap the entire bellows assembly. For a paper-only repair, glue new Tyvek paper over the old bellows with adhesive. The job requires basic hobby tools, takes 30 to 90 minutes, and parts cost roughly $15 to $40.
Table of Contents
Signs Your Cuckoo Clock Bellows Need Replacement
The bellows are the most failure-prone part of any cuckoo clock. They are made of folded leather, paper, or synthetic fabric that flexes thousands of times per year, and they eventually crack, tear, or lose their seal.
Here are the symptoms I check first before opening any clock:
No cuckoo sound at all when the clock strikes the hour
Weak, raspy, or airy cuckoo instead of a clean two-note call
Only one note plays instead of the classic two-note pattern
Visible cracks, peeling, or brittleness on the bellows surface
Bellows tops detach from the tubes when you touch them gently
The clock keeps time correctly but makes no sound, meaning the movement itself is fine
If you hear a whistle but no cuckoo tone, the problem is likely the bellows. If you hear nothing and the clock stops running, the issue is usually the movement or mainspring, not the bellows. Always confirm the movement works before tearing into the bellows.
Understanding Bellows vs Bellow Tops: What’s the Difference?
The bellows are the accordion-like chambers that pump air. The bellows tops are the small caps that sit on top of each bellows and connect them to the whistles. They are two different parts, and confusing them is the number one mistake beginners make.
The Bellows (the body)
The bellows itself is a folded chamber made of leather, cardboard, Tyvek, or paper. Air gets squeezed through it when a lever pushes down on the top plate. Most bellows are rectangular boxes about 2 inches tall, 1.5 inches wide, and 1 inch deep. They live inside the clock case behind the bird door.
The Bellow Tops (the cap)
The bellow top is a small square cap that fits on the open end of the bellows tube. It has a small hole that directs air into the whistle pipe. Bellow tops wear out faster than the bellows body because the glue joint between the cap and the tube is the weakest point.
Which Part Should You Replace?
Use this simple decision rule based on what I have seen in the repair community and on my own bench:
Replace just the bellow tops if the bellows body looks fine but the whistle sounds weak or air leaks from the top joint.
Replace the full bellows if the body is cracked, peeled, or shows visible holes.
Replace just the paper if the body is intact but the surface is torn and you want a budget-friendly repair.
Tools and Materials You’ll Need
Gather everything before you start. Nothing kills momentum like discovering you are missing the right epoxy halfway through. Here is the toolkit I keep on my clock bench:
Hobby knife or X-Acto knife with fresh #11 blades
Small needle-nose pliers for gripping old bellows
Jeweler’s screwdriver set for movement mounting screws
Two-part epoxy (5-minute cure, like JB Weld or Loctite)
Cyanoacrylate (super glue) for paper-only repairs
Tyvek paper or Tyvek fabric (not regular paper, not Tyvek paper envelopes)
Replacement bellows sized to your clock (measure the old ones first)
Replacement bellow tops (sold separately by Clockworks, Timesavers, and Merritt’s)
Sandpaper 400-grit for cleaning tube surfaces
Cotton swabs and isopropyl alcohol for degreasing
Painter’s tape to hold parts while epoxy cures
Bright flashlight or headlamp for inspecting inside the case
The total cost for a first-time repair runs about $25 to $50 in tools and parts. After the first job, you only need to buy replacement bellows or tops, which run $8 to $25 depending on size.
How to Replace Cuckoo Clock Bellows: Step-by-Step Guide
This is the full replacement method, which I recommend if the bellows body itself is damaged. The full swap takes about 45 minutes the first time and 20 minutes once you have done it twice.
Step 1: Remove the Movement from the Case
Open the back of the clock and locate the wooden movement mounting screws. Most movements are held by two or three small wood screws. Remove them and gently slide the movement forward, leaving the chains attached to the weights.
Lay the movement on a soft towel on your workbench. Never let the chains dangle or they will tangle the weights and damage the gears.
Step 2: Locate and Inspect the Bellows
The bellows sit on top of the movement inside the case. They look like two small cardboard boxes with a folded accordion shape. They are usually mounted with small wood screws or held by friction-fit tabs.
Inspect each bellows by gently squeezing it. If it does not spring back, has visible cracks, or feels brittle, it needs full replacement.
Step 3: Remove the Old Bellows
Unscrew or unclip each bellows from the movement. If the bellows are glued in place, slide a hobby knife under the base to break the glue seal. Take your time here. One slip can scratch the movement or damage the case.
Note how the bellows were oriented. Take a photo with your phone before removal so you can match the orientation when installing the new ones.
Step 4: Prepare the Mounting Surface
Scrape any old glue or debris off the bellows mounting surface on the movement. Lightly sand the area with 400-grit sandpaper and wipe clean with isopropyl alcohol. A clean surface is the difference between bellows that stay put for 20 years and bellows that pop off in six months.
Step 5: Mount the New Bellows
Position the new bellows in the same orientation as the old ones. Secure with the original screws if they still fit, or use small wood screws one size smaller to avoid splitting the movement bracket. If the bellows are friction-fit, apply a small dab of epoxy on the base tab and press into place.
Hold the bellows in position with painter’s tape until the epoxy sets, usually 10 to 15 minutes.
Step 6: Reinstall the Movement
Slide the movement back into the case, making sure the chains run freely through their guides. Reattach the mounting screws, then gently hang the weights to test that the clock runs.
Replacing Just the Bellow Tops (Snap-On Method)
This is the easier repair and the one I recommend for most first-timers. The bellows body is usually fine. It is the bellows top glue joint that fails first, because it flexes every time the bird calls.
Step 1: Snap Off the Old Bellow Top
Use a sharp utility blade to pry the old bellow top off the tube. Slide the blade under the edge of the cap and twist gently. The cap should pop off with a clean snap. Discard the old top.
If the cap is stubborn, score around the base with the blade first, then pry. Do not pry so hard you bend the tube.
Step 2: Clean the Tube Surface
Scrape any old glue or debris off the end of the bellows tube. Lightly sand the surface with 400-grit until it feels slightly rough. Wipe clean with isopropyl alcohol and let it dry for two minutes.
Step 3: Test-Fit the New Top
Snap the new bellow top onto the tube without glue. It should sit flat and square. If it wobbles, sand the tube end flat or try a different size top. Bellows tops come in several inner diameters, so measure the tube before ordering.
Step 4: Epoxy the New Top in Place
Apply a thin bead of two-part epoxy around the top edge of the tube. Press the new bellow top down firmly. Wipe away excess epoxy with a cotton swab dipped in alcohol.
Hold the top in place with a small piece of painter’s tape across the bellows for 15 minutes while the epoxy cures. Do not skip this step. A shifted top will leak air and ruin the cuckoo sound.
Step 5: Let It Cure Fully
Wait a full 24 hours before reinstalling the bellows and testing the clock. Epoxy reaches full strength at 24 hours, even if it feels hard after 15 minutes.
Tyvek Paper Replacement Method
The paper-only method is the cheapest repair, but it is also the fiddliest. I use this method when the bellows body is structurally sound but the outer surface has torn or cracked. Tyvek is the right material. Regular paper absorbs moisture and fails within months. Reddit clock repair forums have confirmed this over hundreds of threads.
Step 1: Remove the Bellows from the Movement
Follow the removal steps above. The paper repair only works if you can take the bellows out and work on them flat on the bench.
Step 2: Cut the Tyvek to Size
Lay the bellows on a piece of Tyvek and trace around it, adding a half-inch overlap on all sides. Cut the Tyvek with sharp scissors. Cut two pieces, one for the front and one for the back.
Use Tyvek fabric if you can find it. It is softer, easier to glue, and folds more naturally than Tyvek paper. You can buy it from specialty clock suppliers or salvage it from old shipping envelopes, but make sure it is the soft fabric type, not the stiff envelope material.
Step 3: Apply Adhesive to the Bellows
Brush a thin layer of super glue or contact cement across one face of the bellows body. Press the Tyvek piece onto the glued surface and smooth out wrinkles with your fingers. Repeat on the opposite side.
Trim the excess Tyvek flush with the bellows edges using a sharp hobby knife. A clean edge is critical. Any overhang will catch on the case when you reinstall the bellows.
Step 4: Reinstall and Test
Reattach the bellows to the movement and test the clock. The cuckoo sound should be noticeably crisper and louder than before the repair. If the sound is still weak, check that the bellows tops are sealed and that air is not leaking around the base.
Testing and Troubleshooting Your Repair
After any bellows repair, run the clock through a full hour cycle and listen closely. The cuckoo should alternate between two clear, distinct notes. Both bellows should pump air visibly through the whistles. Here is how to fix the most common post-repair problems.
The Cuckoo Sounds Weak or Airy
This means air is leaking somewhere. Check the bellow top glue joint first, then the base mounting. Re-epoxy any suspect joints and wait 24 hours before retesting.
Only One Note Plays
One of the two bellows is not pumping air. Remove the movement and manually squeeze each bellows. The faulty one will feel soft or spongy. Replace it.
The Bellows Tops Pop Off After a Few Weeks
This means the epoxy did not bond. Either the tube was not clean enough or the epoxy was past its shelf life. Sand the tube again, clean with alcohol, and use fresh epoxy.
The Clock Runs But the Bird Door Won’t Open
This is unrelated to the bellows repair. The bird door mechanism is on a separate lever, and it can come out of adjustment when you remove the movement. Refer to your clock’s service guide for the door linkage adjustment.
DIY vs Professional Repair: Cost Comparison
I get this question from readers every week. Here is the honest breakdown based on my own experience and quotes from three different clock shops.
DIY parts cost: $15 to $40 for bellows, bellow tops, and Tyvek
Professional repair cost: $120 to $250, including shipping if you mail the clock
Time investment (DIY): 30 to 90 minutes for first-timers, 20 minutes after that
Time without clock (professional): 2 to 6 weeks, depending on the shop’s backlog
If your clock has sentimental or antique value above $300, a professional repair is worth considering for the documentation alone. If it is a standard Regula or Hermle movement, the DIY method is the right call. You will save money and learn a skill you can use again.
Where to Buy Replacement Bellows and Bellow Tops
I have ordered from all three of these suppliers and had good results with each:
Clockworks (clockworks.com) – The widest selection of bellows and bellow tops, with detailed sizing charts
Merritt’s Clock Shop (merritts.com) – Great for vintage Black Forest parts and antique movements
Timesavers (timesavers.com) – Best prices on bulk Tyvek and adhesive supplies
Always measure your old bellows before ordering. Match the height, width, depth, and tube diameter. A bellows that is even 3mm off in any direction will not seal properly.
Safety Precautions When Working With Clock Mechanisms
Cuckoo clock movements are precision instruments, but they are also full of sharp edges, spring tension, and small parts that vanish if you drop them. Keep these safety basics in mind:
Always lay the movement on a soft towel, never on bare benchtop
Use a parts tray for screws and small parts
Wear safety glasses when prying old bellow tops
Keep epoxy and super glue away from your skin and eyes
Never force a screw or part. If it resists, stop and inspect
Keep the weights on their chains at all times. Unspooled chains are a nightmare to restring
Preventive Maintenance Tips
A good bellows repair should last 15 to 20 years. Here is how to make sure yours does:
Keep the clock away from direct sunlight and heat vents, which dry out the bellows material
Avoid placing the clock in bathrooms or kitchens where humidity swings damage the paper
Lubricate the movement pivots every 5 to 7 years with clock oil, not WD-40
Wind the clock regularly. A clock that sits idle for months dries out the bellows faster
Inspect the bellows once a year by gently squeezing them
FAQs
What is the best glue for cuckoo clock bellows?
Two-part epoxy with a 5-minute cure time is the best glue for cuckoo clock bellows and bellow tops. Brands like JB Weld, Loctite, and Gorilla Epoxy all work well. Super glue works for paper-only Tyvek repairs but is too brittle for bellow top joints.
What material is used for cuckoo clock bellows?
Modern cuckoo clock bellows are made from Tyvek fabric, a high-density polyethylene fiber that is tear-resistant, flexible, and moisture-proof. Vintage bellows were made from leather, cardboard, or layered paper. Tyvek has become the standard because it lasts 15 to 20 years compared to 5 to 10 years for paper.
Are cuckoo clocks hard to repair?
Cuckoo clock bellows repairs are not hard for beginners with basic hobby tools. The job requires patience more than skill. Movement overhauls, mainspring replacements, and chain restringing are harder and often best left to professionals. Bellows and bellow top replacements are within reach of most DIYers.
How do I know if my bellows need full replacement or just the paper?
Replace the full bellows if the body is cracked, brittle, or has visible holes. Replace just the paper if the body is structurally sound but the surface has torn or peeled. If only the bellow tops are loose, replace just the tops. When in doubt, start with the cheapest fix (tops or paper) and only replace the full bellows if the cuckoo sound stays weak.
Can I use regular paper instead of Tyvek?
No. Regular paper absorbs moisture, sags, and fails within months. Use Tyvek fabric or Tyvek paper specifically. Tyvek is the same material used in house wrap and protective envelopes, and it holds its shape for decades. Reddit clock repair communities have confirmed over many threads that paper substitutes always fail.
Final Thoughts on DIY Cuckoo Clock Bellows Replacement
Cuckoo clock bellows replacement is one of the most satisfying repairs a clock owner can do. The parts are cheap, the tools are basic, and the result is immediate. The first time your clock calls out again after the repair is a moment you will not forget.
Start with the simplest fix first. If only the bellow tops are loose, swap them with epoxy and you are done. If the body is damaged, go for the full replacement or the Tyvek paper method. Either way, the job is well within reach of any DIYer willing to spend an hour at the bench in 2026.