
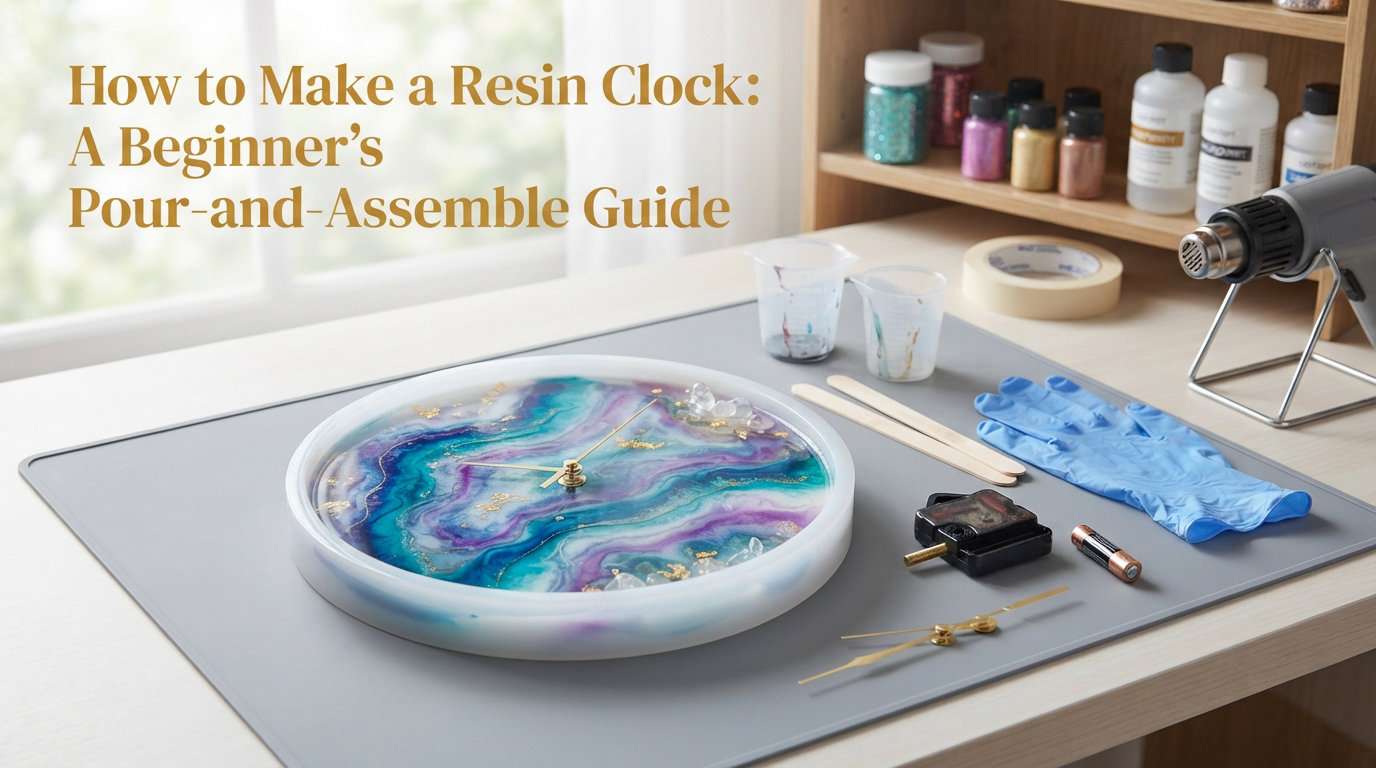
I built my first resin clock on a Saturday with two cups of coffee, a cheap silicone mould, and a YouTube tutorial on repeat. By Sunday night it was hanging on my wall, ticking perfectly, and I was already planning the next one.
If you have ever wondered how to make a resin clock that actually looks like the ones you see on Etsy, this pour-and-assemble guide walks you through every step. I have made fifteen of these now, three of them sold at a local craft fair, and I will share what worked, what failed, and how to skip the messy parts.
By the end of this guide, you will know which resin to buy, how much you need for a 12-inch clock, how to avoid bubbles, and how to install a clock mechanism so the hands spin smoothly. Whether you want a beach-themed wall piece, a geode-style gift, or just a weekend project, this tutorial covers it.
Table of Contents
What Is a Resin Clock and Why Make One?
A resin clock is a decorative wall clock made by pouring two-part epoxy resin into a mould, adding colour and design elements, letting it cure, and then installing a quartz clock mechanism through the centre. The result is a piece that is both functional and a piece of art.
Resin clocks work because epoxy resin is self-levelling, crystal-clear when cured, and accepts almost any colourant or embedded object. Once you add a clock mechanism, you get a custom timepiece that nobody else owns.
I started making them because I could not find a wall clock that matched my living room colours. After my first one, friends asked for them as gifts. The hobby turned into a small side income in under a year.
Why resin clocks are beginner-friendly
Resin clock making is one of the easier resin projects to start with. The mould does most of the shaping work, the resin self-levels, and the clock mechanism is a simple drop-in part. You do not need woodworking skills or expensive tools.
What makes a resin clock different from other crafts
Unlike painting or woodwork, resin gives you a glass-like finish without kiln work or varnish. Unlike polymer clay, you do not need to bake anything. The only trade-off is patience, since cure times run 24 to 72 hours depending on the product.
Materials and Tools You’ll Need
Here is the full checklist I use for every clock I make. I have grouped items by purpose so you can shop in one pass.
Resin and hardener
Buy a quality two-part epoxy resin designed for casting, not coating. Casting resin has a longer working time (around 40 minutes) and a lower viscosity, which means fewer bubbles and a smoother pour. For a 12-inch clock at roughly 15 mm thick, plan on about 350 to 400 ml of mixed resin.
Silicone mould
Use a round silicone mould sized 10 to 12 inches across. Silicone releases cleanly and withstands the heat that epoxy releases during cure. Avoid plastic moulds; they can stick or warp.
Clock mechanism kit
A standard quartz clock movement with a shaft length of about 20 mm fits a 12 to 18 mm thick clock. The kit includes the movement, three hands (hour, minute, second), a hanger, and a nut. Most run on a single AA battery.
Colourants and design elements
Pigment pastes, alcohol inks, mica powders, and metallic powders all work. Dried flowers, sea glass, crushed shells, glitter, and small stones are popular inclusions. Choose elements that are completely dry before embedding.
Tools and safety gear
You will need plastic mixing cups, silicone stir sticks, a digital kitchen scale (resin ratios are weight-based), nitrile gloves, safety glasses, and a respirator rated for organic vapours. A heat gun or kitchen torch removes surface bubbles.
Work in a warm, dust-free room with good ventilation. Lay down a silicone mat or wax paper to catch drips. A level surface matters more than you would think, since resin finds every tilt.
Quick materials checklist
- Two-part epoxy casting resin (400 ml mixed for a 12-inch clock)
- Round silicone mould, 10 to 12 inches
- Quartz clock movement with 20 mm shaft
- Resin pigments or alcohol inks
- Plastic mixing cups and silicone stir sticks
- Digital kitchen scale (grams)
- Heat gun or small kitchen torch
- Nitrile gloves, safety glasses, respirator
- Sandpaper: 220, 400, 800, 1500, 3000 grit
- Drill with a small bit sized to the clock shaft
Step-by-Step Guide: Pour and Assemble Your Resin Clock
This is the exact sequence I follow. I have included timing notes based on my own batches, so you know when to wait and when to act.
Step 1: Set up your workspace and mould
Place your mould on a perfectly level surface. I check with a small bubble level on top of the mould before every pour. Wipe the inside of the mould with a microfibre cloth to remove dust. Dust is the most common cause of cloudy spots on the finished face.
Set out all your colourants, stir sticks, and mixing cups before you open the resin. Once the two parts are combined, the clock is ticking and you cannot stop to hunt for supplies.
Step 2: Measure and mix the resin
Pour Part A and Part B into separate cups first. Most casting resins use a 1:1 ratio by volume or a 100:83 ratio by weight. Read your bottle, because ratios vary by brand. Pour both parts into a clean mixing cup and stir slowly for three full minutes, scraping the sides and bottom as you go.
Stirring too fast whips air into the mix, which is the main cause of bubbles. I stir the way I whisk matcha, in slow figure-eights, not the way I whisk eggs.
Step 3: Pour the first base layer
Pour a thin base layer, about 3 to 4 mm deep, into the mould. This layer becomes the back of the clock, so it can be a single solid colour or clear. Use your heat gun to sweep across the surface two or three times, holding it 15 cm away, until tiny bubbles rise and pop.
Wait about four to six hours, or until the layer is tacky but not fully hard, before adding the next layer. This timing depends on room temperature and resin brand.
Step 4: Add colour and design elements
Mix small batches of tinted resin in separate cups, one colour per cup. Pour them in thin ribbons or pools onto the base layer, then drag a stir stick through to create swirls. For a geode effect, drop blobs of contrasting colour around the edge. For an ocean theme, blend blue, white, and a touch of green.
Drop inclusions like dried flowers, shells, or gold leaf onto the tacky surface. Do not press them in; the next layer will lock them in place. Keep inclusions away from the very centre, where the clock mechanism will go.
Step 5: Pour the remaining layers
Add the rest of your clear or tinted resin in two or three pours, letting each one cure to a tacky stage before the next. Multiple thin layers beat one thick pour every time, because thick pours can overheat, crack, or yellow in the centre.
Total thickness for a 12-inch clock should be 15 to 18 mm. Thinner than 12 mm leaves no room for the clock shaft, and thicker than 20 mm is just wasted resin.
Step 6: Cure and demould
Let the clock cure for a full 24 hours at room temperature, ideally 22 to 25 degrees C. Cooler rooms slow the cure and can leave the surface tacky. After 24 hours, gently flex the silicone mould to release the casting. If it sticks, let it cure another six hours.
Never force a clock out of the mould. The edges chip easily, and a chipped resin clock is impossible to repair invisibly.
Step 7: Drill the centre hole for the mechanism
Measure the centre of the clock and mark it with a small piece of tape. Use a drill bit sized to match your clock shaft, usually 8 mm. Drill slowly with light pressure, holding the clock face-up on a scrap of wood. Clear acrylic drill bits cut cleaner than metal ones.
Drilling resin takes patience. If you push too hard, the bit can crack the face or wander off-centre. A drop of water on the drill site keeps dust down and cools the bit.
Step 8: Sand and polish the edges
Start with 220 grit to knock down any sharp edges or mould lines. Work up through 400, 800, 1500, and finish at 3000 grit. I learned from the r/ResinCasting community that wet sanding with water as a lubricant gives the smoothest finish and extends paper life. After 3000 grit, buff with a soft cloth and a drop of polishing compound for a glass-like sheen.
Step 9: Install the clock mechanism and hands
Push the clock shaft through the centre hole from the back. Slip the rubber washer onto the shaft, then thread the brass nut on and tighten by hand. Snap on the hour hand first, then the minute hand, then the thin second hand. Each hand sits on a stepped shaft, so they stack without tools.
Add a single AA battery, set the time, and hang it on the wall with the included hanger on the back. Listen for the tick. That first tick is the moment every resin clock maker remembers.
Design Ideas for Your First Resin Clock
Design choice matters as much as technique. Here are four proven styles that beginners can pull off, plus the colourants and inclusions that work for each.
Ocean and beach theme
Pour a sandy beige base layer with real sand mixed in. Top with swirling blues, whites, and greens. Drop tiny shells, sea glass, or crushed abalone pieces around the edge. This is the most popular resin clock on Etsy and the easiest to sell.
Geode-inspired design
Use deep purples, blues, and golds in concentric rings. Embed resin crystals or crushed glass near the rim to mimic amethyst or quartz. The contrast against the dark base is what gives geode clocks their signature look.
Wood and resin combination
Pour resin into a live-edge wood round with a routed lip. Wood clocks cost more in materials but sell for higher prices. Seal the wood with a thin layer of resin first to prevent bubbles from escaping through the grain.
Dried flower clock
Press flowers flat for two weeks, then arrange them on the base layer before the next pour. Pale petals show up best against dark resin, and metallic gold leaf around the flowers adds a gift-worthy touch.
Sanding, Polishing, and Finishing Your Clock
Finishing is what separates a craft fair clock from an Etsy-quality clock. Skip this step and the edges look raw, the surface looks hazy, and the piece feels cheap in the hand.
Sanding grit progression
Work through grits in order: 220 to remove mould lines, 400 to smooth edges, 800 to remove the 400-grit scratches, 1500 to begin the polish, and 3000 for the final matte-smooth surface. Wet sand at every stage after 400 grit. Wipe clean between grits or you carry coarser grit scratches into the finer paper.
Polishing for a glass-like finish
After 3000 grit, apply a small amount of plastic polish or polishing compound to a soft microfibre cloth. Buff the surface in circles for two to three minutes. The resin face will go from matte to clear in front of you. This step is what gives high-end resin clocks their depth.
Sealing the back
Spray or paint the back of the clock with a clear sealant to protect the colour from UV yellowing. Epoxy resin resists yellowing better than polyester resin, but a UV-resistant top coat adds years of clarity, especially on clocks hung in sunny rooms.
Troubleshooting Common Beginner Problems
Every resin clock maker hits these issues at some point. Here is what causes them and how to fix them without throwing the whole piece away.
Bubbles appearing in the cured resin
Bubbles come from stirring too fast, pouring too high, or cold resin. Mix slowly, pour from a low height, and warm your resin bottles in a water bath before mixing if your room is below 20 degrees C. After pouring, sweep a heat gun across the surface within five minutes to pop rising bubbles. Surface bubbles disappear, but bubbles trapped between layers stay, so work fast between pours.
Resin staying sticky or soft after 24 hours
A sticky cure almost always means the ratio was off, or the resin and hardener were not stirred thoroughly. Cold rooms below 18 degrees C also slow the cure. If the clock is tacky after 48 hours, scrape off the soft layer and pour a fresh coat on top. Going forward, measure by weight on a kitchen scale, not by eye.
Clock mechanism not fitting through the centre
This means the drilled hole is too small, or the clock is thicker than the shaft length. Check the shaft length on your movement before you drill. Standard shafts run 13 to 20 mm. If your clock is 18 mm thick, you need the longer shaft version, not the standard one.
Chipped edges after demoulding
Resin chips when the mould is removed too early, or when the casting is flexed. Always wait the full cure time. If the edges still chip, the mould may have small scratches. Coat the inside of the mould with a thin layer of mould release before the next pour to extend mould life.
Yellowing over time
All epoxy yellows slightly with UV exposure, but cheap resin yellows faster. Use a resin labelled UV-resistant or non-yellowing, and keep the clock out of direct sunlight. A coat of clear UV spray every two years keeps the colour true.
Frequently Asked Questions
How do you make a resin clock?
Mix two-part epoxy resin in a 1:1 ratio, pour a base layer into a round silicone mould, add pigment and inclusions, pour additional layers until 15 to 18 mm thick, cure for 24 hours, demould, drill a centre hole, and install a quartz clock mechanism through the back.
How do you avoid bubbles in resin clocks?
Stir the resin slowly for three minutes, pour from a low height, warm the resin to room temperature before mixing, and sweep a heat gun across the surface within five minutes of each pour to pop rising bubbles before they cure in place.
What should you not put in resin?
Avoid fresh flowers, food, porous materials that hold moisture, and anything that may bleed colour. Use only dried flowers, sealed objects, and dry inclusions. Moisture is the most common cause of cloudy or uncured resin.
How much resin is needed for a clock?
A 12-inch round clock at 15 mm thick needs roughly 350 to 400 ml of mixed resin. Smaller 10-inch clocks need about 250 ml. Larger 16-inch clocks need around 500 ml. Always mix a little extra to avoid running short mid-pour.
How long does resin take to cure for a clock?
Casting resin typically takes 24 hours to cure fully at 22 to 25 degrees C. Working time between pours is four to six hours, when the previous layer is tacky but not solid. Full hardness for demoulding arrives at 24 hours, and the resin reaches its final strength at 72 hours.
Final Thoughts on Making Your First Resin Clock
Learning how to make a resin clock is one of the most satisfying weekend projects I know. The materials are affordable, the steps are repeatable, and the finished piece is something you actually use every day.
Start simple. Pick one colour, one inclusion, and a 12-inch mould. After your first clock, you will already see what you want to change for the next one. That is how every resin artist I know got started, including the ones selling full time.
Once you have the basics down, explore the variations: wood and resin combos, geode designs, ocean themes, glow-in-the-dark inclusions. Each style uses the same nine steps, just with different colours and embedded objects. The pour-and-assemble method is your foundation, and the design choices are where your own style comes through.