
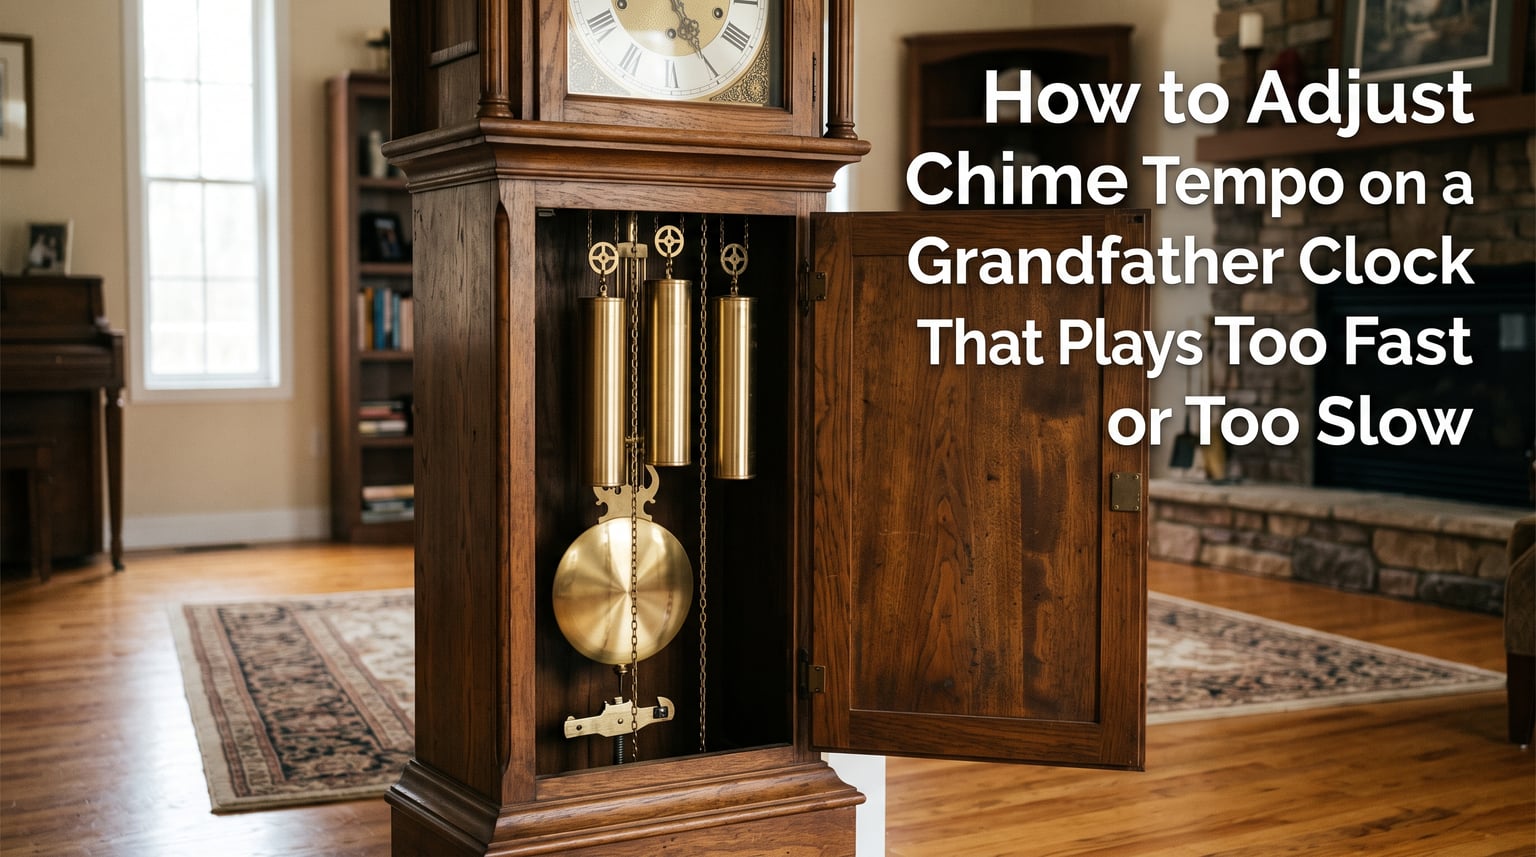
Your grandfather clock has been in the family for years, and suddenly the chimes sound rushed or sluggish. Maybe the Westminster melody plays like it is in a hurry, or the hour strike drags on painfully slow. If you are trying to figure out how to adjust chime tempo on a grandfather clock that plays too fast or too slow, you are in the right place.
Here is the catch that trips up most clock owners: the chime tempo and the timekeeping speed are two different things controlled by two different mechanisms. Most guides you will find online talk only about pendulum adjustment, which regulates how fast the hands move around the dial. But if your actual chime melody is playing at the wrong pace, that is a separate issue entirely.
I have spent years working with mechanical clock movements, and I will walk you through both adjustments in this guide. You will learn how to regulate the pendulum for timekeeping accuracy, how to address chime tempo problems, how to troubleshoot a stuck adjustment nut, and when it is time to call a professional. Everything here applies to cable-driven and chain-driven grandfather clocks from brands like Howard Miller, Ridgeway, and Hermle.
Table of Contents
Understanding Chime Tempo vs. Timekeeping Speed
This distinction is the single biggest source of confusion among grandfather clock owners, and almost no guide on the internet explains it clearly. Let me fix that right now.
Your grandfather clock has three separate trains, or gear systems, inside the movement. The time train drives the hands and is regulated by the pendulum. The chime train plays the melody (Westminster, Whittington, or St. Michael) every fifteen minutes. The strike train counts the hours.
When people search for how to adjust chime tempo on a grandfather clock, they are usually experiencing one of two problems. Either the chime melody itself plays too fast or too slow, or the clock is gaining and losing time and they assume the chimes are the cause.
If your clock is gaining or losing time (the hands do not match a reference clock after 24 hours), you need to adjust the pendulum. That is a timekeeping regulation problem. The chime melody will still play at its normal tempo even if the clock is running fast or slow.
If the actual melody sounds wrong (rushed, sluggish, or labored), that is a chime tempo problem. This is usually caused by the heaviest weight being on the wrong side, a lack of lubrication in the chime train, or a mechanical issue inside the movement. The pendulum adjustment will not fix this.
I will cover both situations thoroughly in the sections below.
How to Adjust Chime Tempo on a Grandfather Clock
Let us start with timekeeping regulation, since that is the most common adjustment you will make on a grandfather clock. The process involves turning a small nut at the bottom of the pendulum rod to raise or lower the pendulum bob, which changes how fast the clock runs.
Step 1: Locate the Rating Nut
Open the lower door of your clock case or remove the side access panel. Look at the bottom of the pendulum rod, just beneath the round pendulum bob. You will see a small threaded nut, usually brass, screwed onto the end of the rod.
This is called the rating nut, sometimes called the adjustment nut or regulating nut. Turning this nut is the only correct way to change the speed of your clock’s timekeeping. Do not bend the pendulum rod, do not add weights to the bob, and do not try to move the bob by hand without turning the nut.
Before making any adjustment, note the exact time on a reference clock or phone. Write it down along with what your clock dial currently shows. This becomes your baseline for tracking progress.
Step 2: How to Slow Down Your Grandfather Clock
If your clock is running fast (gaining time over 24 hours), you need to lengthen the effective pendulum. A longer pendulum swings more slowly, which slows the clock down.
Turn the rating nut clockwise (to the right, as viewed from below). Each full turn lowers the pendulum bob slightly, lengthening the swing arc and slowing the clock. The standard rule of thumb is that one full turn of the nut changes the clock’s rate by approximately one to two minutes per day, though this varies by movement.
Make small adjustments. Turn the nut one full rotation, then set the clock to the correct time using the minute hand. Wait 24 hours and compare the clock to your reference time again. If it is still fast, turn the nut another half to full turn and repeat.
One helpful trick from experienced clockmakers: mark the rating nut position with a tiny dot of nail polish before you start adjusting. This gives you a visual reference point so you always know how far you have turned the nut from its original position.
Step 3: How to Speed Up Your Grandfather Clock
If your clock is running slow (losing time over 24 hours), you need to shorten the effective pendulum. A shorter pendulum swings faster, which speeds the clock up.
Turn the rating nut counter-clockwise (to the left, as viewed from below). This raises the pendulum bob up the threaded rod, shortening the pendulum and making the clock run faster.
Again, make small adjustments. One full turn counter-clockwise should speed up the clock by roughly one to two minutes per day. Set the hands to the correct time, wait 24 hours, and check again.
Be patient with this process. I have seen people turn the nut five full rotations at once and then wonder why the clock is suddenly way off in the other direction. Small, measured turns followed by a full day of observation is the correct approach.
Step 4: Day-by-Day Tracking for Fine-Tuning
Regulating a grandfather clock is a multi-day process. The first adjustment gets you close, but fine-tuning to within a minute or two per week takes several rounds.
On Day One, set the clock to the exact correct time and note the rating nut position. Let the clock run undisturbed for a full 24 hours. On Day Two, compare the clock’s time to your reference and calculate how many minutes it gained or lost.
If the clock gained two minutes, turn the rating nut clockwise about one full turn. If it lost two minutes, turn counter-clockwise about one full turn. Reset the hands to the correct time and start another 24-hour observation period.
Continue this cycle for five to seven days, making progressively smaller adjustments as the daily error shrinks. By the end of the process, you should have the clock regulated to within one or two minutes per week. This is excellent accuracy for a mechanical movement.
Keep in mind that temperature changes will affect the rate even after you have it dialed in. Check back in a month or two, especially after a change in seasons.
Weight Placement and Its Effect on Chime Function
This section addresses the actual chime tempo problem, which is separate from timekeeping regulation. If your Westminster melody sounds sluggish, rushed, or labored, the most common cause is incorrect weight placement.
Most grandfather clocks have three weights hanging from either chains or cables. These weights are not identical. On virtually all modern grandfather clocks, the heaviest weight powers the chime train. Putting the heaviest weight on the wrong side will cause the chimes to play slowly or sluggishly, or the chime train may stall entirely.
Here is the standard weight arrangement for most Howard Miller, Ridgeway, Hermle, and similar clocks. When facing the clock, the heaviest weight goes on the left side (the chime side). The center weight powers the time train, and the right weight powers the strike train.
This is a critical detail I see mentioned constantly on clock repair forums. Users move their clock, rehang the weights in the wrong positions, and then report that the chimes play slowly or the clock stops chiming altogether. Simply swapping the heaviest weight to the left side often fixes the problem immediately.
If you are not sure which weight is the heaviest, take them all down and weigh them on a kitchen scale. The difference is usually noticeable, sometimes by a pound or more. Label them with a small piece of tape (L, M, R or heaviest, center, lightest) so you never mix them up again.
Troubleshooting Common Adjustment Problems
Sometimes the adjustment process does not go as planned. Here are the most common problems clock owners encounter, based on years of forum discussions and real-world experience.
Pendulum Bob Won’t Move When You Turn the Nut
This is probably the single most frustrating problem people report. You turn the rating nut, but the pendulum bob stays put. The nut spins freely without raising or lowering anything.
The most likely cause is that the pendulum bob is binding against the threaded rod or the suspension fork. The bob slides on the rod, and if there is corrosion, dirt, or a burr on the rod, the bob cannot move smoothly. Try gently wiggling the bob side to side while turning the nut to help it break free.
If that does not work, the threads on the rating nut or the rod may be stripped. This happens frequently on older inherited clocks. A stripped thread means the nut can no longer push or pull the bob effectively. You will need to replace the rating nut or the pendulum assembly, which is a job best left to a clock repair professional.
Another possibility is that the bob has a set screw or locking collar that is tight against the rod. Check whether there is a small screw on the side or top of the bob that needs to be loosened before the bob can slide.
Clock Still Runs Fast at Maximum Adjustment
If you have turned the rating nut clockwise as far as it will go and the clock is still gaining time, the pendulum may be too short for the movement. This can happen if the pendulum was replaced with the wrong size at some point in the clock’s history.
It can also indicate that the suspension spring is stretched, bent, or damaged. The suspension spring is the thin strip of metal at the top of the pendulum that flexes as the pendulum swings. If it is not original or is worn out, the pendulum’s effective length changes.
In either case, you are past the DIY adjustment stage. A clockmaker can measure your movement and recommend the correct pendulum length or replace the suspension spring.
Sluggish Chimes After a Move or Long Inactivity
If your clock sat unused for months or years, or if you recently moved it, the chimes may play slowly or the clock may stop entirely. This is extremely common.
First, make sure all three weights are in the correct positions, with the heaviest on the left. Second, check that the clock is level front to back and side to side. An unlevel clock causes the pendulum to swing unevenly and can stop the chime train from running properly. Use a small bubble level on top of the case.
If the clock has been sitting for a long time, the movement may need cleaning and oiling. Clock oil dries out over the years, creating friction that slows the chime train. Do not use WD-40 or household oil. These will attract dust and eventually damage the movement. Use only proper clock oil applied to the pivot points, or take the clock to a professional for a full cleaning.
Temperature and Seasonal Effects on Your Pendulum
Your grandfather clock is sensitive to temperature changes, and this affects its accuracy throughout the year.
Heat causes metal pendulum rods to expand, making them longer. A longer pendulum swings more slowly, so your clock will run slightly slower in summer. Cold causes contraction, making the clock run slightly faster in winter. The effect is small, typically a minute or two per day at temperature extremes, but it adds up over weeks.
Wooden pendulum rods, found on some older clocks, are even more sensitive to humidity and temperature than metal rods. If your clock has a wooden rod, expect more seasonal variation and check the accuracy every few months.
This is completely normal behavior for any mechanical clock. Do not panic and over-adjust every time the seasons change. Make small corrections and accept that some seasonal drift is part of owning a mechanical timepiece.
When to Seek Professional Clock Repair
DIY adjustment can take you a long way, but some problems require a trained horologist. Knowing when to stop and call a professional will save you from causing expensive damage.
Seek professional help if the rating nut is stripped and the bob will not move, if the clock still runs fast or slow at maximum adjustment range, or if the chimes play incorrectly even with correct weight placement. These indicate internal movement problems that you cannot fix at home.
You should also call a professional if you hear grinding, clicking, or binding sounds from the movement, if the pendulum will not keep swinging even after leveling, or if the clock has not been serviced in ten or more years. Mechanical clock movements need cleaning and oiling every three to five years to prevent wear.
A full movement overhaul, called a cleaning and oiling service, typically costs a fraction of replacing the movement entirely. Ignoring the problem and letting the clock run dry will cause pivot wear and gear damage that costs significantly more to repair.
I always recommend finding a clock repair professional through the American Watchmakers-Clockmakers Institute (AWCI) directory or the National Association of Watch and Clock Collectors (NAWCC). These organizations maintain lists of certified horologists in your area.
FAQs
Why is my grandfather clock chiming so slowly?
Slow chimes are usually caused by the heaviest weight being on the wrong side of the clock. On most grandfather clocks, the heaviest weight goes on the left side to power the chime train. If the chimes are still slow with correct weight placement, the movement likely needs cleaning and oiling. Do not use WD-40; use only proper clock oil or take the clock to a professional.
How do you slow down a grandfather clock that runs too fast?
Turn the rating nut at the bottom of the pendulum clockwise (to the right) to lower the pendulum bob and lengthen the swing. One full turn slows the clock by about one to two minutes per day. Make small adjustments and check accuracy after 24 hours.
How do I get my grandfather clock to chime correctly?
First, make sure the heaviest weight is on the left side to power the chime train. Second, check that the clock is level using a bubble level. Third, if the chimes have fallen out of sync with the hour shown on the dial, advance the minute hand clockwise to the next hour and let it strike, then continue advancing to the correct time, allowing the clock to chime fully at each quarter-hour position.
How do I sync the chimes to match the correct hour?
Move the minute hand clockwise only, stopping at each quarter-hour mark to let the chimes play fully. When you reach the 12 o’clock position, count the number of strikes. If the strike count does not match the hour shown, move the hour hand gently to match the number of strikes, then set the correct time using the minute hand.
Conclusion
Learning how to adjust chime tempo on a grandfather clock that plays too fast or too slow starts with understanding the difference between chime tempo and timekeeping speed. The pendulum rating nut controls how fast the clock gains or loses time, while the actual chime melody pace depends on weight placement and movement lubrication.
Take your time with the adjustment process. Small turns, daily tracking, and patience will get your clock running accurately within a week. If you hit a wall with a stripped nut, a pendulum that will not cooperate, or chimes that refuse to play properly despite correct weight placement, call a certified clockmaker. These are mechanical treasures worth preserving, and a professional service every few years will keep yours chiming beautifully for decades.