
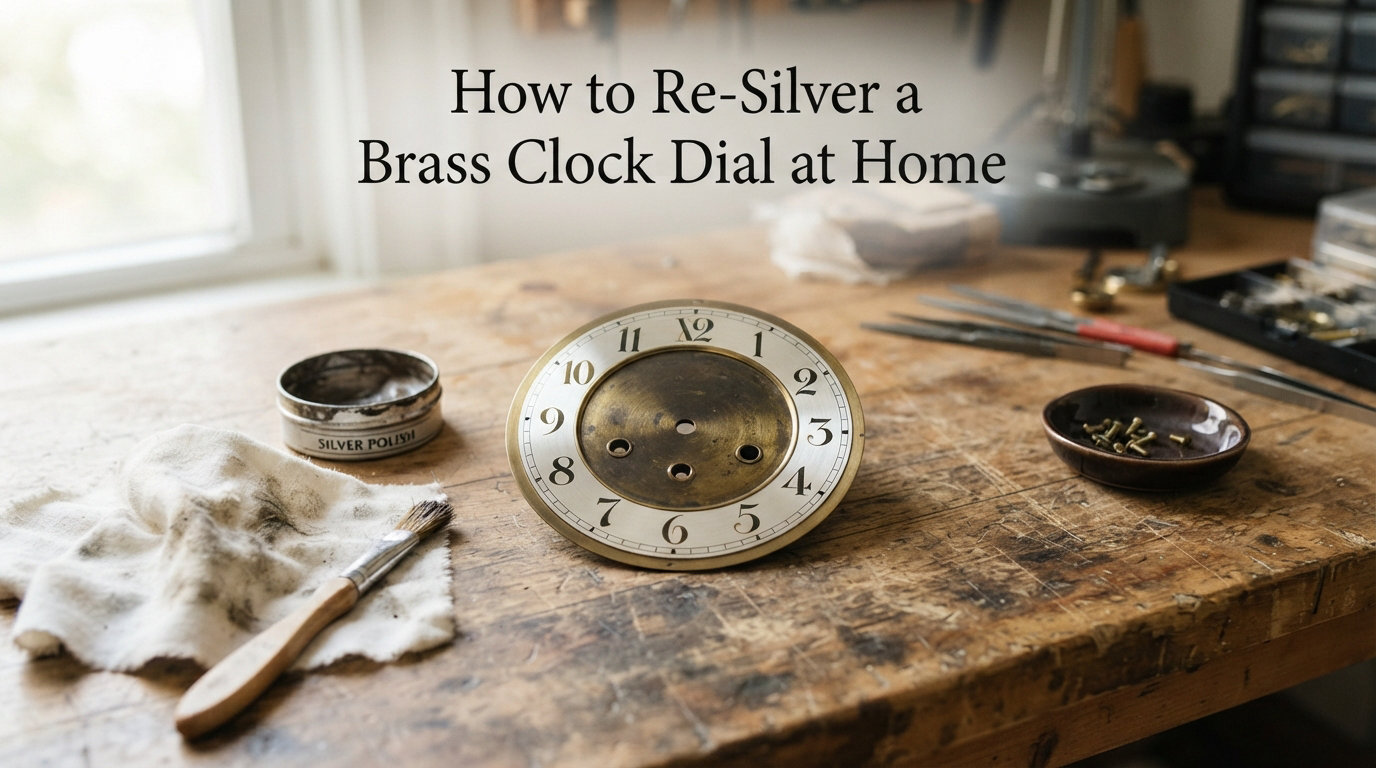
Brass clock dials lose their silvered finish after decades of exposure to air, moisture, and handling. That familiar dull brass look means the thin silver layer has worn away, leaving the numerals hard to read and the dial looking tired. The good news is that you can re-silver a clock dial at home using a chemical process that horologists have relied on for over a century.
I have restored several antique dials using this exact method, including a tall case clock from the 1880s and a ship’s bell clock with a badly faded chapter ring. The process involves an ion exchange reaction, not electroplating, which means you do not need expensive equipment. With the right silvering powder, some patience, and careful surface preparation, you can bring a brass dial back to its original frosted silver appearance.
This guide walks you through every step of how to re-silver a brass clock dial at home, from cleaning and sanding the brass to applying the silvering powder and protecting the finished surface. I will also cover safety precautions, troubleshooting common problems, and how DIY restoration compares to hiring a professional.
Table of Contents
How to Re-Silver a Brass Clock Dial at Home: Quick Overview
To re-silver a clock dial, you clean and sand the brass surface, protect the engraved numerals with wax, apply silvering powder using damp cotton wool in circular motions, then neutralize and seal the finish. The entire process takes about 2 to 4 hours of active work plus drying time.
Here is the quick version of what you will do, step by step:
Remove the dial from the clock movement carefully
Clean the brass surface thoroughly with soap and water
Wet sand the dial with 400-grit then 600-grit abrasive paper
Apply black engraver’s wax to protect numerals and engraving
Apply silvering powder to damp cotton wool and rub in circular motions
Neutralize with cream of tartar, rinse, and dry completely
Burnish the surface with a soft cloth for a frosted finish
Apply Renaissance wax or lacquer to protect the silver layer
Each step matters because skipping preparation or rushing the silvering application leads to patchy, uneven results. I learned this the hard way on my first dial restoration, so this guide emphasizes the details that separate a good result from a frustrating one.
What Is Clock Dial Re-Silvering? The Science Explained
Clock dial re-silvering is a chemical restoration process that bonds a thin layer of silver directly to a brass surface through ion exchange. Unlike paint or plating, the silver becomes part of the metal surface itself, which is why original silvered dials can last for a century or more.
The process works because brass is an alloy of copper and zinc. When you apply silver chloride powder to clean brass, the silver ions in the powder swap places with copper ions in the brass. This ion exchange reaction deposits real silver onto the dial while copper dissolves into the solution. Cream of tartar, or potassium bitartrate, acts as the developer that drives this reaction forward by creating the right acidic environment.
This is the same principle behind a process called cementation silvering, which clockmakers have used since the 1700s. Modern silvering powders simplify the chemistry into a ready-to-use product, but the underlying reaction is identical. The result is a soft, frosted silver finish that reflects light evenly and creates strong contrast with black-painted numerals.
Silvered dials look better than polished brass for one practical reason: polished brass acts like a mirror and glares under light, making the numerals hard to read. A frosted silver surface scatters light evenly, so the time stays legible from any angle. That is why clockmakers originally chose this finish for tall case clocks, ship’s bell clocks, and regulator dials.
Materials and Tools You Will Need
Gathering your materials before you start saves you from mid-project scrambling, since the silvering process requires quick, uninterrupted work once it begins. Here is everything you need to re-silver a clock dial at home.
Essential Materials
Silvering powder (silver chloride based, available from clock supply specialists like Timesavers or Priory Polishes)
Cream of tartar (available in the baking aisle of any grocery store)
Wet and dry abrasive paper, 400-grit and 600-grit
Black engraver’s wax (sometimes called engraving filler or dial wax)
Renaissance wax or cellulose-based lacquer for the final protective coat
Distilled water for rinsing and mixing
Mild dish soap for initial cleaning
Essential Tools
Cotton wool pads or soft cotton rags (lint-free)
Foam sanding block for even pressure
Soft brass brush for cleaning engraved areas
Turntable or lazy Susan (makes rotating the dial much easier)
Heat gun or hair dryer for wax application
Soft microfiber cloths for burnishing
Nitrile gloves and safety glasses
Plastic container for mixing and rinsing
Budget Alternatives
If you cannot find a turntable, a rotating cake stand works just as well. A standard hair dryer handles wax application fine, though a heat gun gives more control. You can substitute lint-free cotton t-shirt material for cotton wool pads if you run short. The one item I would not substitute is the silvering powder itself, since quality directly affects your results.
Safety Precautions for Working with Silvering Chemicals
Silvering powder contains silver chloride and other reactive chemicals that require basic safety handling. No competitor I found in my research covers these precautions, but they matter if you want to protect your skin, eyes, and lungs during the process.
Wear nitrile gloves throughout the entire silvering process. Silver chloride can stain skin a dark purple-brown color that takes days to fade, and some people experience mild skin irritation from prolonged contact. Safety glasses protect against splashing when you rinse the dial, since the rinse water carries dissolved copper salts.
Work in a well-ventilated area, ideally outdoors or in a garage with the door open. The silvering reaction releases small amounts of gas as copper dissolves from the brass surface. This is not dangerous in small quantities, but working in a closed room for an extended period can cause mild respiratory irritation.
Keep a container of clean water nearby for emergency rinsing. If silvering powder or solution contacts your eyes, flush immediately with water for 15 minutes and seek medical attention. Store leftover silvering powder in its original sealed container, away from children and pets.
Dispose of rinse water responsibly. The spent solution contains dissolved copper, so do not pour it down a storm drain or onto soil. The safest option is to pour it into a container, let the water evaporate, then bag the dry residue for household hazardous waste collection.
Surface Preparation: Cleaning and Sanding the Brass Dial
Surface preparation is the single most important step in dial silvering. The ion exchange reaction only works on clean, bare brass, so any oil, tarnish, or old coating will block the silver from bonding. I spend roughly half my total project time on preparation alone, and it pays off every time.
Step 1: Remove the Dial from the Movement
Carefully detach the dial from the clock movement, noting how everything connects so reassembly goes smoothly. Take photos of the dial in place from multiple angles before you start removing screws. Handle the dial by its edges only to avoid transferring finger oils onto the brass face.
Step 2: Clean Off Dirt and Old Wax
Wash the dial with warm water and mild dish soap using a soft cloth. This removes surface dirt, dust, and oily residue from years of handling. If the dial has heavy grime in the engraved numerals, use a soft brass brush gently to lift debris from the grooves. Dry the dial completely with a lint-free cloth.
Step 3: Wet Sand with 400-Grit Paper
Wet sand the entire dial surface using 400-grit wet and dry abrasive paper soaked in water. Work on a flat surface or place the dial on your turntable. Move the paper in small circles, following the grain direction of the brass where one is visible. Keep the paper wet at all times to prevent clogging and to carry away metal particles.
Sand until you see fresh, uniform brass across the entire surface. This step removes old silvering remnants, fine scratches, and oxidation. Pay special attention to the chapter ring and spandrel areas, since these decorative zones tend to collect tarnish in their details. Do not rush this step, because any remaining old coating will show through the new silver.
Step 4: Wet Sand with 600-Grit Paper
Repeat the wet sanding process with 600-grit paper to refine the surface. The finer grit removes the scratches left by the 400-grit and creates a smoother base for the silvering powder. You want a surface that looks evenly matte, not polished. If the brass looks mirror-bright, you have over-sanded, which can cause the silvering to go on too thinly.
Step 5: Final Clean and Inspection
Wash the dial again with distilled water and inspect the surface under good lighting. Look for any spots where old coating, tarnish, or deep scratches remain. If you find any, go back and sand those areas until the entire dial has a consistent matte finish. Dry with compressed air or a lint-free cloth, then handle only by the edges from this point forward.
Rewaxing Numerals and Engraving
Before you apply silvering powder, you need to protect the black numerals and engraved markings on the dial. The silvering process would otherwise cover them or cause the black paint to lift. Rewaxing restores the sharp black contrast that makes a silvered dial readable.
Applying Black Engraver’s Wax
Black engraver’s wax, also called dial wax or engraving filler, is a soft compound that fills engraved grooves with durable black pigment. Warm the wax slightly with a heat gun or hair dryer until it becomes pliable but not liquid. Press the wax into the engraved numerals and markings using a small applicator or a piece of rigid card.
Work the wax firmly into every groove, covering each numeral, the minute track markings, and any decorative engraving on the spandrels. You want the wax to sit slightly proud of the surface. Let it cool for a few minutes until it hardens completely.
Removing Excess Wax
Once the wax has hardened, carefully scrape off the excess using a flat plastic card or a hardwood stick. Never use metal tools for this, since they will scratch the brass. The goal is to leave wax only inside the engraved grooves, with the surrounding brass surface clean and bare.
After scraping, wipe the surface lightly with a soft cloth dampened with a tiny amount of mineral spirits. This removes wax residue from the flat areas without pulling wax out of the grooves. Inspect under good light to confirm all numerals are filled solidly with black wax and the flat brass is clean.
When to Rewax
If your dial has perfectly intact black numerals that are not engraved, you may be able to skip full rewaxing. However, the silvering chemicals can still affect painted numerals, so apply a thin protective coat of wax over them as a barrier. For engraved numerals with faded or missing black fill, full rewaxing is essential before proceeding.
The Silvering Process: Step by Step
This is where the transformation happens. The silvering process itself is fast, taking only 10 to 15 minutes of active application, but every second counts. Read through all the steps before you begin so you can work smoothly without stopping.
Step 1: Set Up Your Workstation
Place the dial on your turntable in a well-lit, well-ventilated area. Have your silvering powder, cream of tartar, cotton wool pads, distilled water, and rinse container all within arm’s reach. Put on your nitrile gloves and safety glasses now.
Step 2: Dampen the Cotton Wool
Take a cotton wool pad and dampen it very slightly with distilled water. The pad should be just barely moist, not wet. If you can squeeze water out of it, it is too damp, and excess water will dilute the silvering powder and cause patchy results. This is the most common mistake beginners make.
Step 3: Apply Silvering Powder
Dip the damp cotton wool into the silvering powder, picking up a thin even layer. Place the powder-coated pad on the dial and begin rubbing in small circular motions. Work one small section at a time, about a 2-inch area, overlapping slightly as you move across the surface.
Rotate the turntable as you work so you can maintain consistent circular motions across the entire dial. The powder will darken as it reacts with the brass, shifting from grey-white to a darker tone as the ion exchange progresses. This color change tells you the reaction is working.
Step 4: Apply Cream of Tartar Developer
Once you have covered a section with silvering powder, immediately apply cream of tartar to develop the silver. Sprinkle a small amount of cream of tartar onto a fresh, slightly damp cotton wool pad. Rub it over the same section in circular motions, working it into the surface.
The cream of tartar drives the chemical reaction that bonds silver to the brass. You will see the surface begin to take on a frosted silver appearance. Work quickly but thoroughly, ensuring even coverage before moving to the next section.
Step 5: Work the Entire Dial
Continue this two-part process, silvering powder followed by cream of tartar, section by section until you cover the entire dial. Pay attention to the chapter ring and around the spandrels, since these detailed areas are easy to miss. Overlap your sections slightly to avoid visible seams in the finish.
For my first dial, I tried to cover the whole surface with powder before applying the cream of tartar, and the result was terribly patchy. Working in small sections ensures the reaction stays active and controlled.
Step 6: Rinse Thoroughly
Once the entire dial is silvered, rinse it immediately with distilled water to stop the chemical reaction. Use plenty of water and pour it gently across the surface. Continue rinsing until the water runs completely clear with no visible powder or residue.
Step 7: Neutralize and Dry
After rinsing, neutralize any remaining active chemicals by wiping the dial with a cotton pad dampened with a weak baking soda solution (one teaspoon of baking soda in a cup of distilled water). Rinse once more with clean distilled water, then dry the dial completely with compressed air or a lint-free cloth.
At this point, the dial will have a matte, frosted silver finish. The numerals should stand out in sharp black contrast. If you see bare brass spots or uneven coverage, do not panic. You can apply a second light pass of silvering powder to those areas.
Finishing and Protecting Your Silvered Dial
The freshly silvered surface is fragile and will tarnish quickly without protection. The finishing step seals the silver layer and gives the dial its final appearance. You have two main options: Renaissance wax or lacquer, and the choice depends on how you want the dial to look and how much durability you need.
Burnishing the Surface
Before applying any protective coating, gently burnish the silvered surface with a soft microfiber cloth. Use light circular motions to even out the texture and bring up a consistent frosted sheen. Do not press hard or use aggressive buffing, since the silver layer is thin and you can rub through to bare brass.
The amount of burnishing controls how shiny the final finish looks. Light burnishing keeps a matte frosted appearance, which is historically accurate for most antique dials. More aggressive burnishing with a soft cloth creates a brighter, more polished silver look for clocks where you want extra sparkle.
Option 1: Renaissance Wax Finish
Renaissance wax is a microcrystalline wax that provides a thin, reversible protective layer over the silvered surface. Apply a small amount with a soft cloth, spreading it as thin as possible across the entire dial. Let it haze for a few minutes, then buff gently with a clean microfiber cloth.
I prefer Renaissance wax for antique clocks because it is fully reversible and does not change the character of the dial. If the silvering ever needs redoing, the wax comes off easily with mineral spirits without damaging the surface. The downside is that wax needs reapplication every few years to maintain protection.
One caution from my own experience: wait until the dial is completely dry before applying wax. I once applied Renaissance wax too soon after silvering, and trapped moisture caused the dial wax in the numerals to blister. Give the dial at least an hour of drying time in a warm, dry environment before waxing.
Option 2: Lacquer Coating
Cellulose-based lacquer provides a harder, more durable protective layer than wax. Apply it in thin, even coats using a soft brush or spray. Lacquer is the better choice for clocks in damp environments or those handled frequently, since it seals the silver completely from air and moisture.
The trade-off is that lacquer is not easily reversible. If the lacquer yellows or chips over time, removing it requires chemical strippers that can damage the silvering underneath. Lacquer also slightly changes the appearance, giving the dial a more glossy look compared to the matte finish of bare or waxed silver.
Reassembling the Dial
Let your protective coating cure fully before reassembling the dial onto the clock movement. Wax needs about 24 hours to harden completely, while lacquer can take 48 hours or more depending on thickness and humidity. Once cured, reattach the dial carefully, handling only the edges, and your restored clock is ready to display.
Troubleshooting Common Silvering Problems
Even with careful preparation, things can go wrong during dial silvering. Here are the most common problems I have encountered and how to fix them.
Patchy or Uneven Silver Coverage
Patchy results almost always come from uneven surface preparation or too much water on your cotton wool. Check that you sanded the entire dial to a consistent matte finish before silvering. If the brass still shows old coating or tarnish in spots, those areas will not accept silver evenly.
To fix a patchy dial, let it dry completely, then lightly re-sand the uneven areas with 600-grit paper. Apply a fresh pass of silvering powder and cream of tartar to just those spots, feathering the edges to blend with the surrounding silver.
Silver Will Not Bond to the Brass
If the powder rubs on but no silver transfers to the brass, the surface is contaminated. Oils from your fingers, residual wax, or old lacquer will block the ion exchange reaction. Re-clean the area with mineral spirits, re-sand with 400-grit paper, and try again with fresh cotton wool.
Black Numerals Are Fading or Lifting
If your numeral wax is coming off during silvering, you either did not let it harden fully or applied silvering powder too aggressively. Let the engraver’s wax cure for at least 30 minutes before silvering. Apply the powder with gentle pressure rather than scrubbing.
To repair faded numerals after silvering, simply reapply black engraver’s wax to the affected numerals using the same technique as before. The wax fills in right over the silvered surface without any issues.
The Silver Is Too Dark or Brassy
A dark or brassy tint means you overworked the silvering powder or applied too much cream of tartar. This happens when you keep rubbing the same area after the reaction has completed. For next time, work faster and move to the rinse step as soon as the frosted silver appears.
To lighten an overworked dial, gently buff with a soft cloth to remove excess silver deposits. If that does not work, you can strip the dial back to bare brass and start the silvering process over from the sanding step.
DIY vs Professional Restoration
You might wonder whether doing this yourself is worth it compared to sending your dial to a professional restorer. The answer depends on your clock’s value, your skill level, and your budget.
Professional dial restoration from specialists typically costs between 200 and 600 dollars for a standard brass dial, and the dial is often away from home for 4 to 8 weeks. High-end restorers like Chelsea Clock charge premium rates for ship’s bell clocks and other specialty pieces, sometimes exceeding 800 dollars for a full dial refinish.
A DIY approach using quality silvering powder and basic tools costs roughly 40 to 80 dollars in materials. That investment covers enough silvering powder for several dials, so the per-dial cost drops even lower if you have multiple clocks to restore. The trade-off is your time and the learning curve.
For clocks with significant historical or monetary value, I recommend professional restoration to preserve authenticity and avoid costly mistakes. For everyday antique clocks, family heirlooms, and practice projects, DIY silvering is a rewarding process that saves substantial money and gives you full control over the result.
FAQs
How to resilver a clock dial?
To resilver a clock dial, clean and wet sand the brass surface with 400 then 600 grit paper, apply black engraver’s wax to protect the numerals, rub silvering powder onto slightly damp cotton wool in circular motions, develop with cream of tartar, rinse thoroughly, and seal with Renaissance wax or lacquer. The active process takes about 2 to 4 hours plus drying time.
Can a watch dial be restored?
Yes, a watch or clock dial can be restored using the silvering process described in this guide. Small watch dials require more delicate handling and less powder, but the chemical ion exchange process works the same way. For very small watch dials, consider practicing on a scrap piece of brass first.
How do you clean a brass clock face?
Clean a brass clock face by washing with warm water and mild dish soap, then wet sanding with 400-grit and 600-grit abrasive paper to remove tarnish and old coatings. Use distilled water for the final rinse to avoid mineral spots, and dry completely with a lint-free cloth before silvering.
How to clean brass weights on grandfather clock?
To clean brass weights on a grandfather clock, wipe them with a soft cloth dampened with soapy water, then dry thoroughly. For heavier tarnish, use a brass polish formulated for antiques and buff gently. Avoid abrasive scrubbing that could remove decorative detail or patina that adds character to the weights.
How much does clock dial restoration cost?
Professional clock dial restoration costs between 200 and 600 dollars for a standard brass dial, with specialty pieces like ship’s bell clocks costing over 800 dollars. A DIY approach using silvering powder and basic tools costs 40 to 80 dollars in materials and can restore multiple dials with a single powder purchase.
How long does the silvering process take?
The active silvering process takes 2 to 4 hours, including surface preparation, numeral rewaxing, silvering powder application, and protective coating. Add 24 to 48 hours for the protective wax or lacquer to fully cure before reassembling the clock. Plan the project across a single weekend for best results.
Conclusion
Learning how to re-silver a brass clock dial at home opens up the ability to restore antique timepieces that would otherwise sit faded and unreadable. The process comes down to careful surface preparation, a straightforward ion exchange reaction with silvering powder and cream of tartar, and a protective finish that seals your work for years.
The keys to success are patience during sanding, barely damp cotton wool during silvering, and working in small sections so the chemical reaction stays controlled. Start with a clock that has sentimental rather than financial value, and you will build confidence for more ambitious restoration projects. Your freshly silvered dial will bring new life to any antique clock, and you will have a skill worth repeating on every brass dial you encounter.